
A regulated 12 volt power supply should be used to power your DigiProg III. If anything above 13.5 volts is used to power the machine,
damage may be caused to the main circuit board and it will need to be sent to your DigiProg dealer for repair.
When connected to a vehicle by OBD DO NOT use the cigar lighter lead, the Digi takes power from the vehicle. Failure to observe will result in
damage not covered by the warranty.
When your DigiProg is powered up, this screen will be displayed whilst your machine is loading:
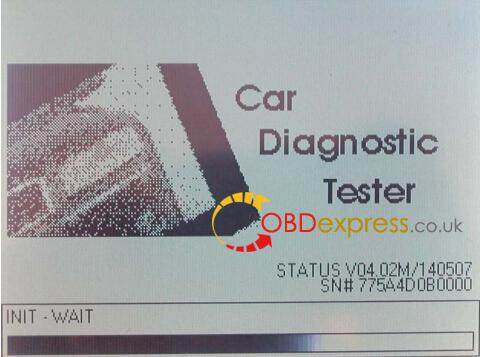
On this screen your DigiProg’s status/software version is displayed along with your machines unique 12 digit electronic serial number.
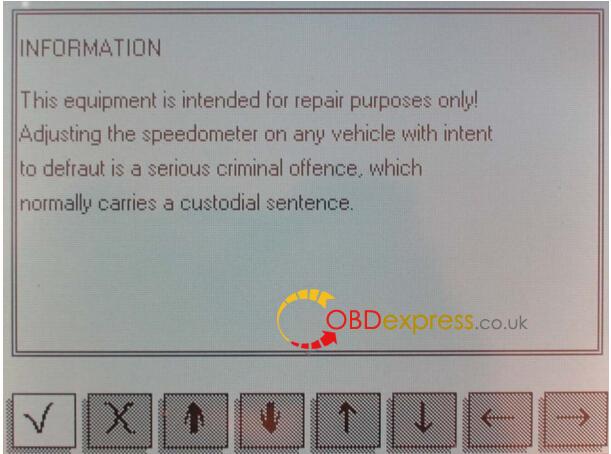
When your DigiProg has finished loading an information screen will appear with a disclaimer regarding the use of the machine. When you
are ready, press the check/tick button.
The DigiProg will then ask for a password to be entered before the machine can be used. The default password is set to 1 but can be
changed in the SETUP function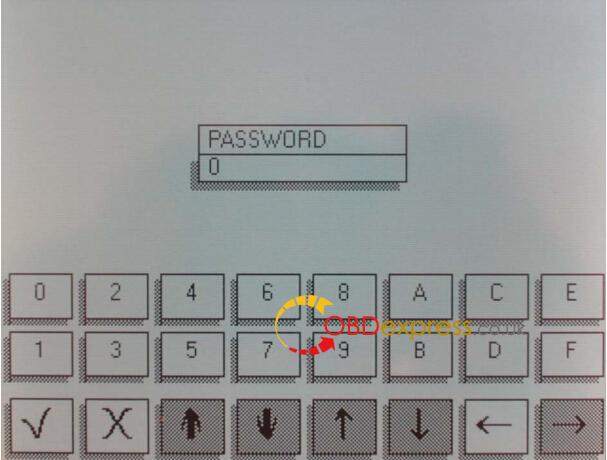
Main menu screen

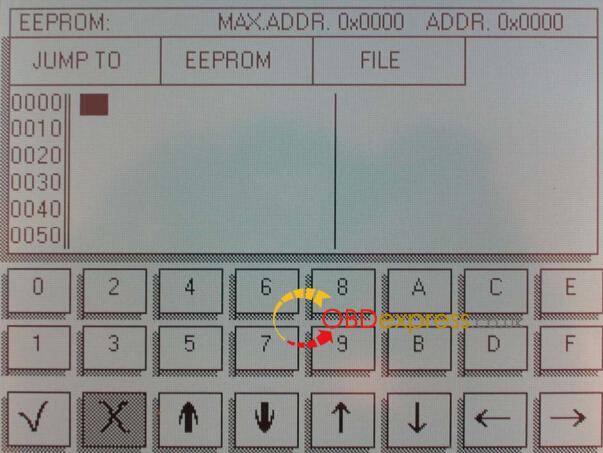
1. EEPROM menu
The first option on the main menu is the Eeprom menu. Reading,writing and saving Eeprom information is all done using this menu.
A more detailed guide to using this menu follows later on in the introduction.
2. CAR/TRUCK menu
This is the menu you will use for correcting and reprogramming vehicles. Manufacturers are set out in alphabetical order and models of vehicles are set out in a simple sub-menu format.
3. Motorcycle Menu
This menu is the same as the CAR/TRUCK menu but is used for reprogramming motorcycles.
4. Special Functions Menu
The special functions menu is for use only by official DigiProg dealers.
5. Setup Menu
This menu is where settings on your DigiProg can be changed. Language, password, brightness, volume, and the time/date can all be set and changed in this menu. You can also change whether your machine is working in kilometres or miles.
Using the EEPROM menu.
On some of the vehicles you will come across, an eight pin Eeprom chip will be used to store the vehicle data. These chips hold vital information from the vehicle such as ignition and immobiliser codes. Loss of this information could result in anything from minor faults, to major faults involving the vehicle not starting and having to be taken to the main dealer. This is why it is very important to read and save the original information from the Eeprom before programming, this way if any errors do occur you can always return to the point you started.
The process of reading and saving this information is very simple. The Eeprom chip itself will have a mask number printed across the
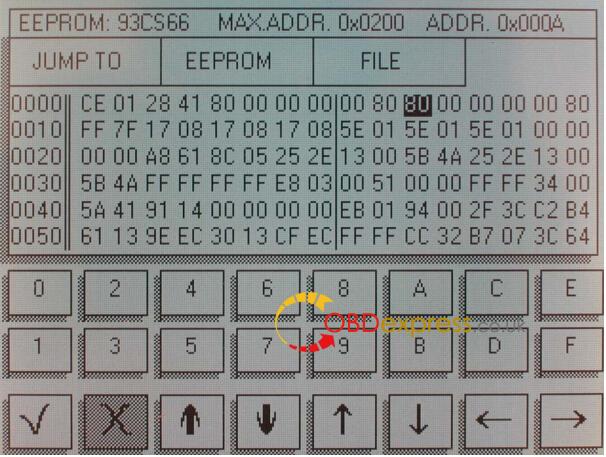
top of it, for example a widely used chip is a 93C46.You can connect the chip to your DigiProg by using adaptor ST1 or ST4. Most chips are surface mount eeproms which will use ST1,but the larger DIL chips will use ST4.
You must then tell your DigiProg which chip you are working on before you read it. To do this you must press the EEPROM button at
the top of the screen. A sub-menu will now appear.
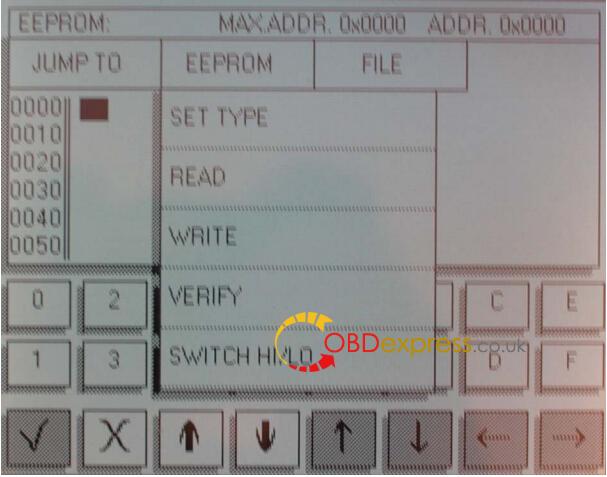
Select the SET TYPE button and choose 93C46. Your DigiProg is now set up to read a 93C46 chip. Press EEPROM again, this time
selecting the READ button. Once the machine has finished reading the chip, the information will be displayed on the DigiProg screen,
now press VERIFY this will ensure that the information on your screen agrees with the Eeprom.
Now you have the original data file from the vehicle you must save it to the DigiProg III.
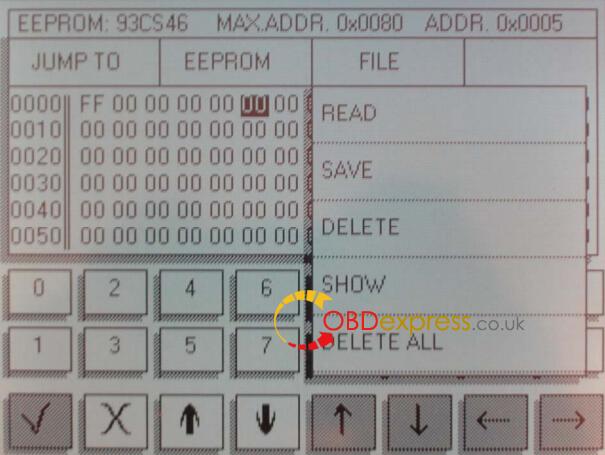
Press the FILE button in the top right corner of your screen.Another sub-menu will appear. When you press the SAVE button
the machine will now ask you to enter a file name for the information you are saving. Once a file name is entered your data is safe and the vehicle is now ready to be reprogrammed, you can only use 0 to 9 & A to F for file names but you can save them to
your PC in Eetool which is supplied with your DigiProg as any name. I would suggest you create a folder in My Documents & call it
Eetool Data Files, then create sub folders in the folder for example Audi, Alfa, Etc.
Please if you are stuck use the help desks on ICQ 178 762 503 or MSN Digiprog, please read your instruction manual before using the
help desk almost all help desk enquiries can be dealt with if you READ the manual.
Finally some important points to remember. Always connect the Eeprom to the ST01 or ST04 before you
connect to the DigiProg this will avoid Electro static feedback
(ESD).
Never solder the connections whilst the lead is connected to the programmer, this will damage the DigiProg.
Please do not sit at home or in your car & play with the DigiProg to see which cars it can do. If you press the DigiProg function keys the
DigiProg will start looking for the Cars protocol, you wouldn’t ask your PC to print if there was no printer.
Always keep your DigiProg in its case when not in Use & keep it in a dry environment at night (don’t leave it in the trunk of your car)
If you are using solvents to remove lacquers’ from Eeprom’s ensure that they are cleaned completely as the solvent can damage the
clips.We hope you will have many years of use from your DigiProg, don’t forget if you are not sure ask the helpdesk.
